How to develop a .NET Core 3.1 API secured with Identity Server 4 — Part 1 | Insights – Reshape Digital
September 16, 2020 by Paul Ionescu
During these series we will dive together in the journey of developing a .NET Core 3.1 API with swagger interface, secured with Identity Server 4. We’re also gonna use .NET API versioning and Redis for server side caching. On the first part of the series we’ll be focusing on creation of the solution and the Identity Server project. At this point I assume you understand the concepts behind securing an API and Identity Server. Either way, I suggest reviewing the Identity Server official docs. Enough talking…let’s get our hands dirty.
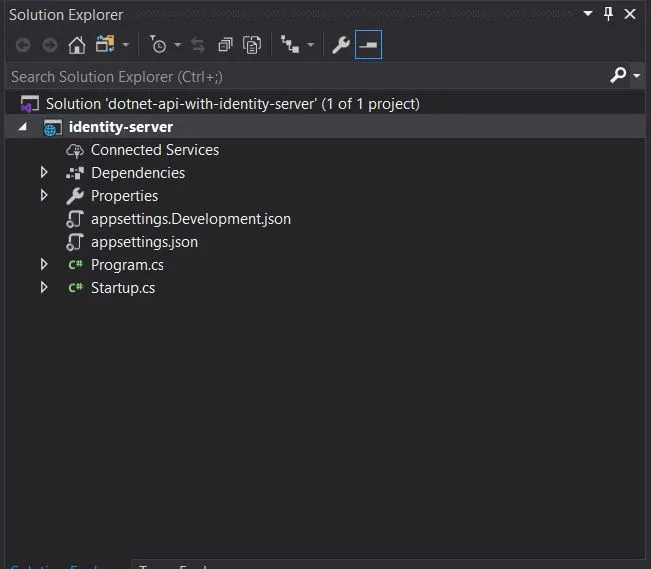
First of all, let’s open Visual Studio and create an empty .NET Core 3.1 web application project and let’s call it “identity-server”. I’ve placed the project under a solution named “dotnet-api-with-identity-server” as you can see in the left. After creating the project, let’s install all the NuGet packages we need for this project. Open the NuGet window and install IdentityServer4 (4.1.0) — of course, the Identity Server package, IdentityServer4.EntityFramework (4.1.0) — we need this because we’ll be using SQL Server as configuration and operational store for Identity Server, Microsoft.EntityFrameworkCore.SqlServer (3.1.8) and Microsoft.EntityFrameworkCore.Design (3.1.8) — both used for dealing with Entity Framework code first migrations for creating the database and the migrations. NOTE: The versions written above are the latest versions at the time of writing this article. Now, let’s add the connection string where our database for storing the identity data will be kept, so in the appSettings.Development.json add a new section name “ConnectionStrings” as below — replace “your_datasource” with the proper data source where your SQL Server resides and only use this type of connection on your local machine in development mode.
//appSettings.Development.json
.
.
,"ConnectionStrings": {
     "IdentityServerDatabase": "Data Source=your_datasource;database=MyIdentityServerDb;trusted_connection=yes;"
}
Next, we are going to switch to Startup.cs file and register in the .NET Core pipeline the Identity Server and configure it’s Configuration and Operational Stores.
public void ConfigureServices(IServiceCollection services)
{
      var connectionString = Configuration.GetConnectionString("IdentityServerDatabase");
      var migrationAssembly = typeof(Startup).GetTypeInfo().Assembly.GetName().Name;

      services.AddIdentityServer()
              .AddDeveloperSigningCredential()
              .AddConfigurationStore(options =>
              {
                  options.ConfigureDbContext = b => b.UseSqlServer(connectionString, sql => sql.MigrationsAssembly(migrationAssembly));
              })
              .AddOperationalStore(options =>
              {
                  options.ConfigureDbContext = b => b.UseSqlServer(connectionString, sql => sql.MigrationsAssembly(migrationAssembly));
              });
}
As it can be observed above, in the ConfigureServices method of Startup.cs we’ve taken the connection string (the one we’ve set at the previous step) from the appSettings.json file and then we’ve registered the Identity Service, we specified to use the Developer Signing Credentials since we are in development mode (this needs to be changed when going to production) and then configured the both configuration store and operational store specifying to use SQL Server with our connection string. At this time we pretty much have more than half of our Identity Server setup, now we need to create the migrations which will contain the code for creating the database table. Make sure you have dotnet ef core tools installed on your machine and than open the package manager console and run the following two commands.
dotnet ef migrations add InitialIdentityServerPersistedGrantDbMigration -c PersistedGrantDbContext -o Data/Migrations/IdentityServer/PersistedGrantDb --project identity-server
dotnet ef migrations add InitialIdentityServerConfigurationDbMigration -c ConfigurationDbContext -o Data/Migrations/IdentityServer/ConfigurationDb --project identity-server
This will create the migrations for the Configuration and Operational Store under the folder Data/Migrations, though at this time the database is not yet populated with the specific tables nor created. Before moving forward, I know I’ve mentioned multiple times the Configuration and Operational Store of the Identity Server, so I need to explain this a bit…Configuration Store is used for encapsulating the configuration data and tables such as clients, resources and scopes, while the Operational Store is keeping the temporary data such as authorization codes and refresh tokens. For a better understanding I do encourage you to read the Identity Server docs.. With the migration in place, only thing left is to actually run the migrations and populate the database with some data. For this, let’s create under the Data folder a Config.cs file.
using System.Collections.Generic;
using IdentityServer4.Models;

namespace identity_server.Data
{
    public static class Config
    {
        public static List<Client> Clients = new List<Client>
        {
                new Client
                {
                    ClientId = "the-big-client",
                    AllowedGrantTypes = new List<string> { GrantType.ClientCredentials },
                    ClientSecrets =
                    {
                        new Secret("secret".Sha256())
                    },
                    AllowedScopes = { "my-api", "write", "read" },
                    Claims = new List<ClientClaim>
                    {
                        new ClientClaim("companyName", "John Doe LTD")
                        //more custom claims depending on the logic of the api
                    },
                    AllowedCorsOrigins = new List<string>
                    {
                        "https://localhost:5001",
                    },
                    AccessTokenLifetime = 86400
                }
        };

        public static List<ApiResource> ApiResources = new List<ApiResource>
        {
            new ApiResource
            {
                Name = "my-api",
                DisplayName = "My Fancy Secured API",
                Scopes = new List<string>
                {
                    "write",
                    "read"
                }
            }
        };

        public static IEnumerable<ApiScope> ApiScopes = new List<ApiScope>
        {
            new ApiScope("read"),
            new ApiScope("write")
        };
    }
}
What we’ve defined here, is a list of clients and a list of API Resources. We’ve created one Client, we’ve set the Client Id, Client Secret and the Allowed Grand Types — this tells us how the client is going to connect to our API Resources, in this case we’ve used client credentials. Under the allowed scopes, we said that the client has access to the API Resource named “my-api” and has the scopes “write” and “read” — these are custom scopes defined for the API Resource object. The claims list can contain any custom claims you need to identity the client id or any business logic, the claims will be encrypted in the access token. AllowedCorsOrigins property indicates from what URLs the client is allowed to access the “my-api” resource and of course, the AccessTokenLifetime is self explanatory. The last list contains the API Scopes we’re gonna use, we need to register this into the store as described below.
Final step, let’s create a DatabaseInitializer class where we’re gonna call the migrations to create the database and after that populate it with our client, API Resource and API Scopes defined in the Config.cs. I’ve placed the file under the folder Data.
using IdentityServer4.EntityFramework.DbContexts;
using IdentityServer4.EntityFramework.Mappers;
using Microsoft.AspNetCore.Builder;
using Microsoft.EntityFrameworkCore;
using Microsoft.Extensions.DependencyInjection;
using System.Linq;

namespace identity_server.Data
{
    public static class DatabaseInitializer
    {
        public static void PopulateIdentityServer(IApplicationBuilder app)
        {
            using (var serviceScope = app.ApplicationServices.GetService<IServiceScopeFactory>().CreateScope())
            {
                serviceScope.ServiceProvider.GetRequiredService<PersistedGrantDbContext>().Database.Migrate();

                var context = serviceScope.ServiceProvider.GetRequiredService<ConfigurationDbContext>();

                context.Database.Migrate();

                if (!context.Clients.Any())
                {
                    foreach (var client in Config.Clients)
                    {
                        context.Clients.Add(client.ToEntity());
                    }

                    context.SaveChanges();
                }

                if (!context.ApiResources.Any())
                {
                    foreach (var resource in Config.ApiResources)
                    {
                        context.ApiResources.Add(resource.ToEntity());
                    }

                    context.SaveChanges();
                }

                if (!context.ApiScopes.Any())
                {
                    foreach (var resource in Config.ApiScopes)
                    {
                        context.ApiScopes.Add(resource.ToEntity());
                    }

                    context.SaveChanges();
                }
            }
        }
    }
}
Using the .NET Core service scope we load the PersistedGrantDbContext — Context of the Operational Store and we migrate it, then we do the same thing for the ConfigurationDbContext. After this two steps the database should be created and the Identity Server tables should be there. Then we just populate the clients table and the API Resources one with our data. Last step is populating the ApiScopes table — if we don’t do this we’ll get an “invalid_scope” error even if we declared the scopes on API Resource and the client.
Last step before running the project is to call the DatabaseInitializer from the Startup.cs Configure method and very important to call the UseIdentityServer() extension method on IApplicationBuilder (last line in the method). This makes the Identity Server endpoints available. For example, you can comment that out and see that you’ll get a 404 on /connect/token.
public void Configure(IApplicationBuilder app, IWebHostEnvironment env)
{
    DatabaseInitializer.PopulateIdentityServer(app);

    if (env.IsDevelopment())
    {
      app.UseDeveloperExceptionPage();
    }

    app.UseRouting();

    app.UseEndpoints(endpoints =>
    {
        endpoints.MapGet("/", async context =>
        {
            await context.Response.WriteAsync("Hello World!");
        });
    });

    app.UseIdentityServer();
}
Everything in place? You’ve run the application with no issues, the database is created? Great 🎆! Now, let’s test it and see if we can obtain a valid token using our client. I like to use Postman for this.
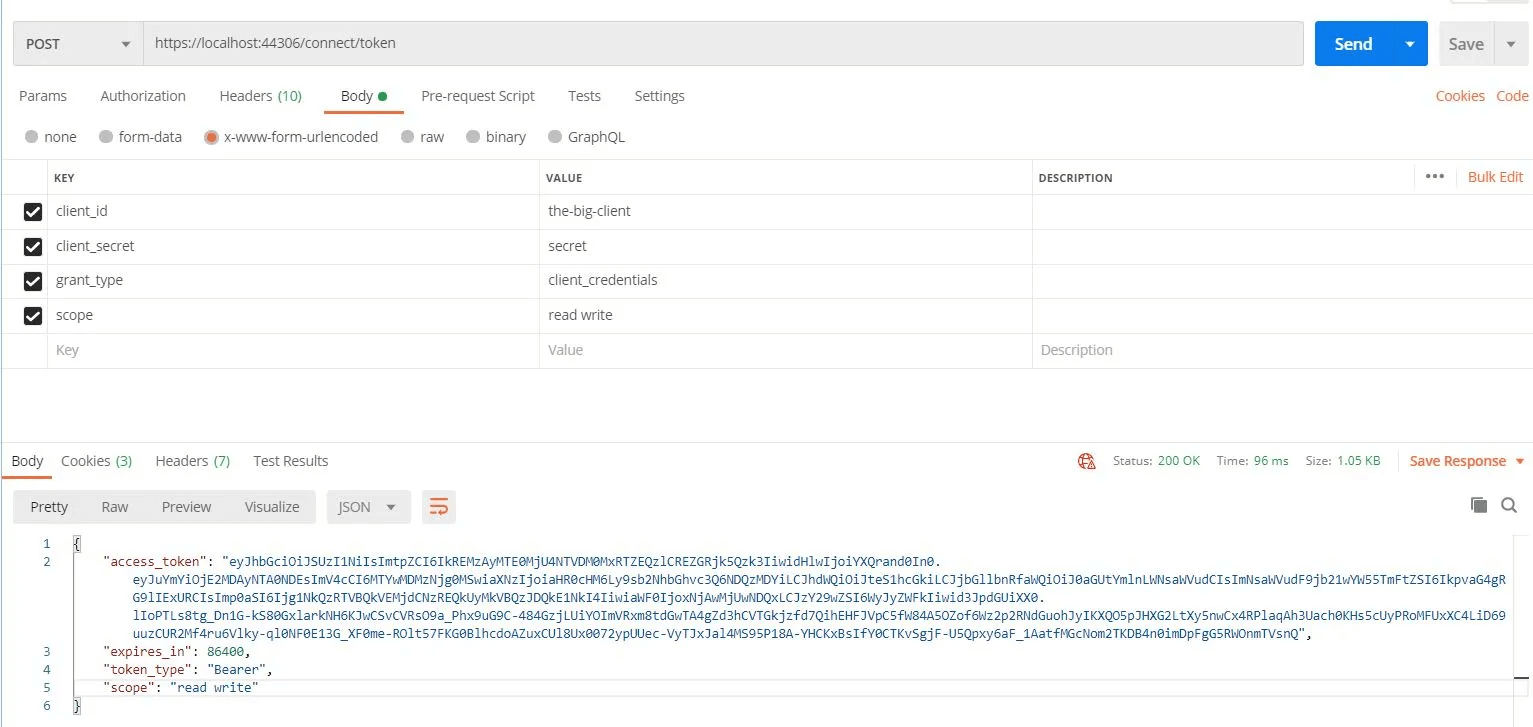
For obtaining a token we call the /connect/token endpoint with a POST request. This endpoint knows to read data from an form url encoded body, so make sure you select the “x-www-form-urlencoded” body. Then, we set the client_id, client_secret, grant_type (client_credentials) — this is the one for which our client has access to and of course the scope that we are requesting. Scopes are divided by spaces. As a response we get the access token, the expiration, the token type and the scopes we’ve requested. You can copy and paste the token to jwt.io and you’ll see exactly what data it contains. This was pretty much all that we’ve need to do for setting up a basic Identity Server and a client that uses the client_credentials flow, in the second part of this series we’re gonna develop the API (My Fancy Secured API) which will be secured by this Identity Server.
GitHub Repo: https://github.com/ionepaul/dotnet-api-with-identity-server
More Insights
We write about what we build, how we think, and the decisions that shape real digital products.

Reshape Digital at London Tech Week
From healthcare to venture capital, we met with industry leaders across London Tech Week to explore AI, innovation, and the future of digital transformation. See what we learned, and where we’re heading next.

Reshape Digital at the London AI Summit
At the London AI Summit, we explored the enterprise future of generative AI, from data governance to fast-impact use cases in HR and customer service. Get our key takeaways from the front lines of AI adoption.

PoC for AI-Powered Drone Solution for Smarter Energy Grid Inspection | Insights – Reshape Digital
At the Energy Expo Cleantech Hackathon in Bucharest, Reshape Digital unveiled an AI-powered autonomous drone platform that redefines power grid inspection. The innovative solution earned a Special Mention for its impact on energy and sustainability.

Tokenizing Renewable Energy for a More Accessible Green Future | Insights – Reshape Digital
GreenVestX is a blockchain-based platform introduced at the Energy Expo Hackathon, designed to democratize renewable energy investments through tokenization. It empowers individuals to co-own and benefit from green energy.

The Role of Vector Database in Modern Data Management | Insights – Reshape Digital
It’s 2024 and vector databases are stepping out of the shadows and into the spotlight, marking a significant technological breakthrough. But what exactly is a Vector Database and why would anyone need it?
Three Years of Reshape Digital | Insights – Reshape Digital
Paul Ionescu reflects on the three-year journey of Reshape Digital, from its humble beginnings with the first project, Lunsjkompaniet, to overcoming challenges like the pandemic and expanding into a thriving community of twenty colleagues.

How to develop a .NET Core 3.1 API secured with Identity Server 4 — Part 2 | Insights – Reshape Digital
Creating the API with Swagger integration and securing it using the Identity Server built in Part 1. Learn to configure authentication, authorization, and token-based access for your endpoints with real-world examples.

7 Essential things to think about when building an API | Insights – Reshape Digital
Security, architecture, testing, logging, documenting, versioning, caching, these seven components are critical for building a sustainable and scalable API. Here’s what you should consider from the very beginning.

Have you ever wondered how to make your Angular application extensible? | Insights – Reshape Digital
Learn how to build a plugin-based Angular architecture where external modules can be loaded dynamically at runtime, enabling feature decoupling, faster deployments, and even third-party extensibility.